
You can add, edit, or remove a DNS Record from cPanel using the cPanel DNS Zone Editor, which allows you to manage, remove, or modify DNS records.
1. Log into your cPanel account. (e.g., www.example.com/cPanel )
2. In the Domains section, click on the Zone Editor icon.
3. You will then see all your Domains listed.
4. Click on Manage for the domain you wish to alter dns for. The DNS records will be loaded on-page.
5. Follow one of the following steps for any record type: A, cName, MX, TXT, etc.
- Edit: Locate the record you wish to edit. Click the Edit option, modify the details, and click on Save Record.
- Remove: Locate the record you wish to remove. There is a Delete option. *Be very careful. Deleting the wrong record can stop something from working.
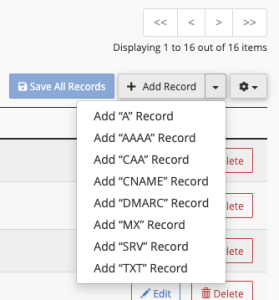
- Add: cPanel makes this easy. Select the record type from the option “Add Record” (see image). Then a small highlighted window will open. Once you have placed your values, click the “save record” button.

Note: It may take anywhere from 12 to 24 hours for the changes to take effect worldwide.